

Mastering the Art of Drawing Springs: Common Techniques and Best Practices Spring
Springs are integral components in various mechanical systems. Consequently, accurate representation of these springs in technical drawings is vital for engineers, designers, and draftspersons. Whether you’re designing a compression spring for a car suspension system, an extension spring for a garage door, or a torsion spring for a clock mechanism, the way you depict these springs can significantly impact the understanding and functionality of your design. In this article, we’ll explore common methods and best practices for spring drawings expressions.
1. Coil Representation:
- The coils in a spring are perhaps the most distinctive feature. Therefore, to accurately depict them, use evenly spaced, circular or elliptical lines that decrease or increase in diameter along the spring’s length. Additionally, the choice of drawing tool, whether it’s a pencil or CAD software, should allow for precision.
2. End Terminations:
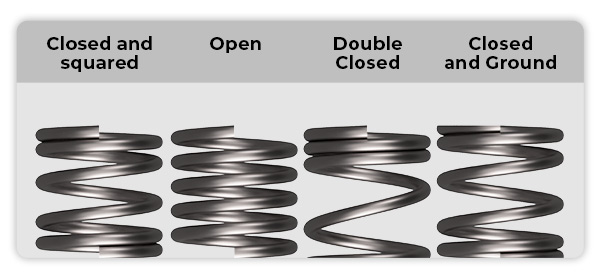
- Springs have unique end terminations. In the case of compression springs, consider drawing two closely spaced coils at each end, indicating the solid termination. For extension springs, they often feature an extended hook or loop. In contrast, torsion springs have straight ends. Drawing these accurately is essential for proper functionality.
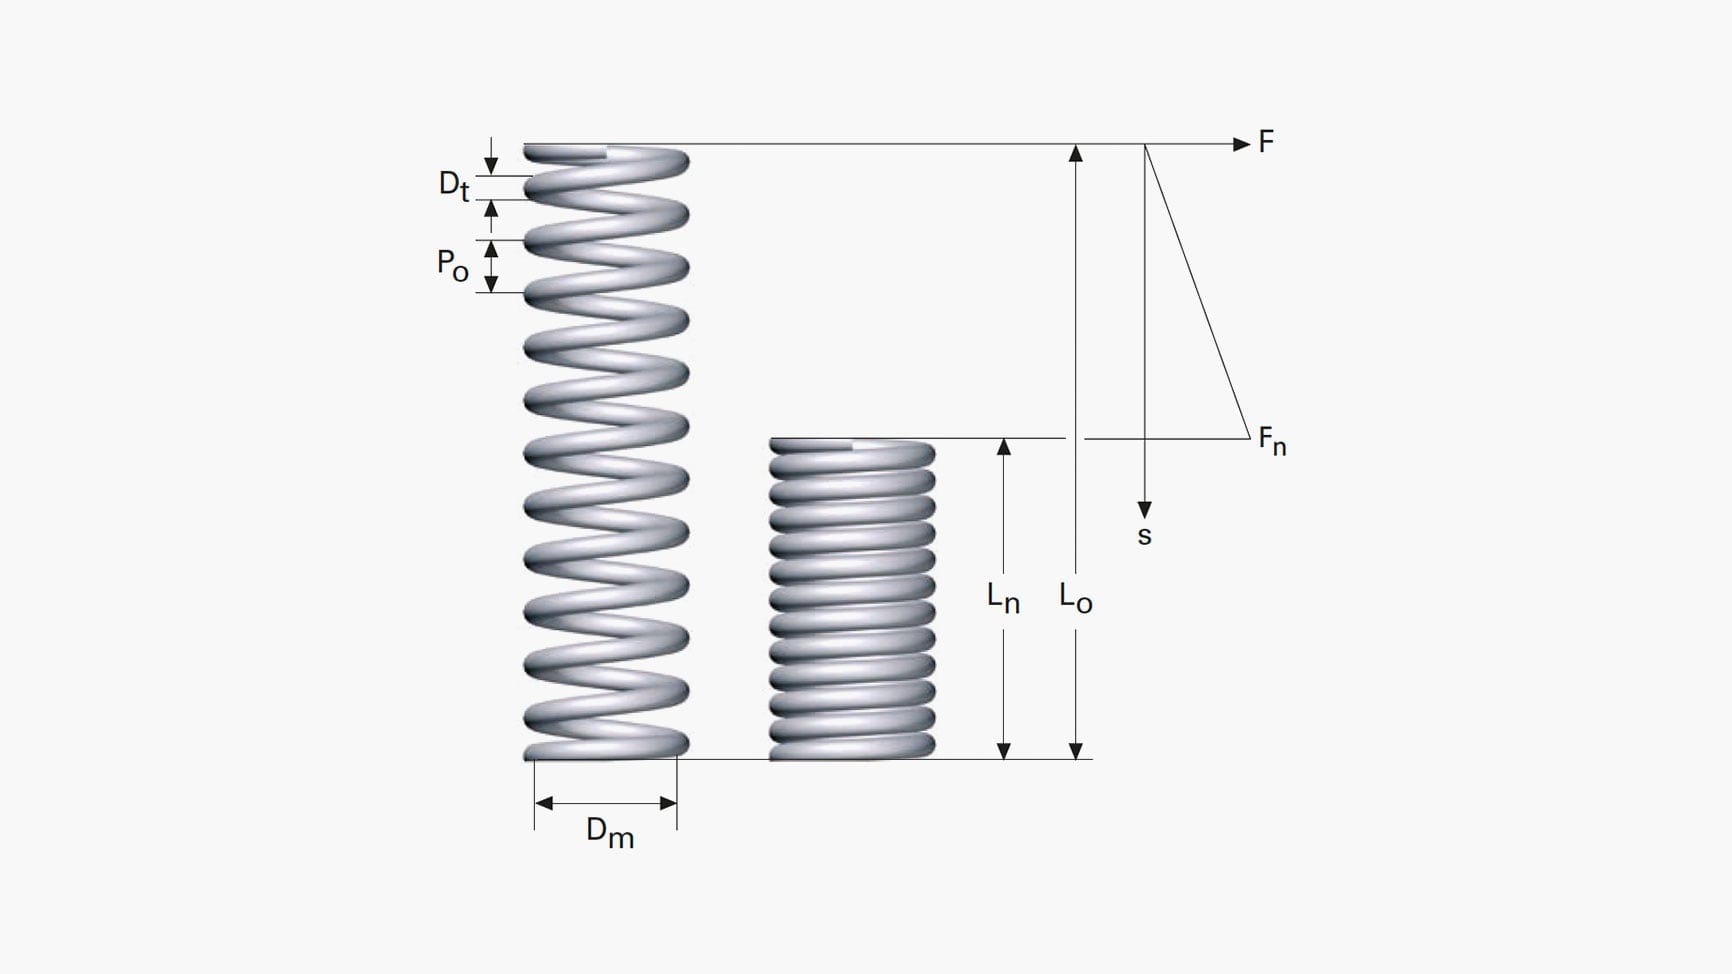
3. Dimensional Accuracy:

- Precision is key. Consequently, include dimensions for the wire diameter, coil diameter, pitch, number of coils, and overall length. Ensure that these dimensions are clear and labeled appropriately..
4. Material Indication:

- Don’t forget to specify the material of the spring. Include the material type and any relevant standards in your drawing or notes. This information is crucial for material selection and manufacturing.
5. Force Direction and Compression/Extension:
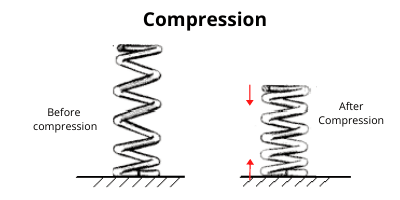
- For instructional purposes, use arrows to indicate the direction in which the spring will compress or extend when subjected to a force. This helps in visualizing the spring’s behavior.
6. Cross-Sections:

- Complex spring designs may require cross-sectional views to reveal internal details. Ensure that these sections are accurate and well-labeled.
7. Annotations and Labels:

- Label critical features like free length, solid height, travel, and other dimensions. Clear annotations make the drawing more informative.
8. Scaling:
- Scale your drawing appropriately, depending on its size and level of detail. Clearly indicate the scaling factor used.
9. Use of 3D Modeling Software:

- Advanced drawings may benefit from 3D modeling software. These programs enable the creation of realistic, three-dimensional representations of springs, offering a more detailed view.
10. Standard Symbols:
- Follow recognized engineering and design standards for symbols and notations when representing springs in technical drawings. Consistency is essential for clear communication.
In summary, mastering the art of spring drawings involves meticulous attention to detail, unwavering precision, and strict adherence to industry standards. Consequently, your ability to accurately represent springs in technical drawings can have a significant impact on the design and functionality of the systems in which they are used. So, whether you’re designing a simple coil spring or tackling the complexities of a torsion spring, applying these common techniques and best practices is undoubtedly the key to success.
( by SHAW from Hengsheng)
Way cool! Some еxtremely valid points! I appreciate you writing this poѕt plus the rest оf the site is very ɡood.
appreciate your favor! if you have any suggestion of improving the articles, pls leave review!
thanks again!